Hello! In this article, I’ll show you how to set up a Japanese environment on Void Linux running the hikari Wayland compositor.
In my previous articles, Installing Void Linux on a UEFI + GPT System (Minimal Installation) and Trying the hikari Wayland Compositor on Void Linux (Getting Started), we installed Void Linux and configured the hikari Wayland compositor. This time, we’ll build on that environment by adding Japanese language support.
Configuring the Locale
Let’s begin by configuring the locale.
When installing Void Linux, I set the locale to en_US.UTF-8 because the system was initially intended for console use. You can check the currently available locales with the following command.
locale -a
Example output
C
POSIX
en_US.utf8
Since ja_JP.UTF-8 is not currently defined, let’s add it.
sudo localedef -f UTF-8 -i ja_JP ja_JP.UTF-8
This adds ja_JP.UTF-8 to the list of available locales. Next, add the following line to the hikari startup script that we created in Getting Started with the hikari Wayland Compositor on Void Linux.
~/start_hikari
...omitted

export LANG=ja_JP.UTF-8

...omitted
exec hikari
Installing Japanese Fonts
If you’re looking for Japanese fonts available on Linux, you may also find my article Free Japanese Fonts for Linux (2019 Edition) helpful.
For this setup, I chose Migu 1M as the monospace font and Migu 1C as the proportional font. Migu 1M is intended for terminal emulators and text editors, while Migu 1C is suitable for web browsers and other GUI applications.
This procedure uses wget and unzip, so install them beforehand if they are not already available.
The following commands install both fonts. You can also download the archives manually using a web browser if you prefer.
# Install Migu 1M
wget https://osdn.net/projects/mix-mplus-ipa/downloads/72511/migu-1m-20200307.zip
unzip migu-1m-20200307.zip
sudo cp -r migu-1m-20200307 /usr/share/fonts/TTF/

# Install Migu 1C
wget https://osdn.net/projects/mix-mplus-ipa/downloads/72511/migu-1c-20200307.zip
unzip migu-1c-20200307.zip
sudo cp -r migu-1c-20200307 /usr/share/fonts/TTF/

# Rebuild the font cache
fc-cache

# Remove the downloaded ZIP archives
rm -f *.zip
Setting Up Japanese Input
Next, let’s configure a Japanese input environment.
In this guide, we’ll use fcitx5 together with fcitx5-mozc. Install the following packages:
- xprop
- fcitx5
- fcitx5-mozc
- fcitx5-gtk
- fcitx5-gtk+2
- fcitx5-gtk+3
- fcitx5-qt
- fcitx5-configtool
Install them with the following command.
sudo xbps-install \
xprop \
fcitx5 \
fcitx5-mozc \
fcitx5-gtk \
fcitx5-gtk+2 \
fcitx5-gtk+3 \
fcitx5-qt \
fcitx5-configtool
Configuring fcitx5
First, add the following environment variables to your hikari startup script (~/start_hikari).
~/start_hikari
...omitted
export GTK_IM_MODULE=fcitx
export QT_IM_MODULE=fcitx
export XMODIFIERS='@im=fcitx'
export DefaultIMModule=fcitx

...omitted
exec hikari
Next, launch fcitx5-configtool from bemenu. Since fcitx5 is not running yet, click the Run Fcitx button to start it.
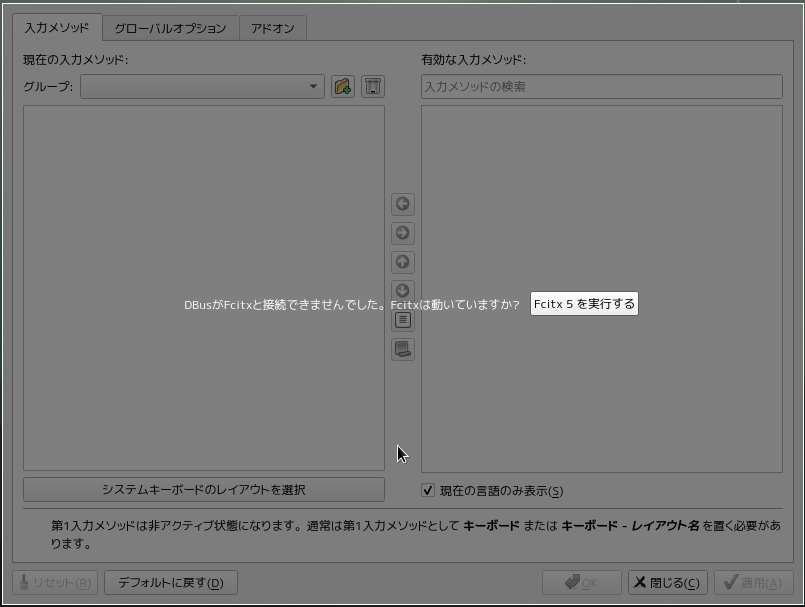
Launching fcitx5-configtool
Add Japanese and Mozc as input methods, as shown below.
Afterward, pressing Ctrl + Space or the Half-width/Full-width key will switch between the registered input methods.
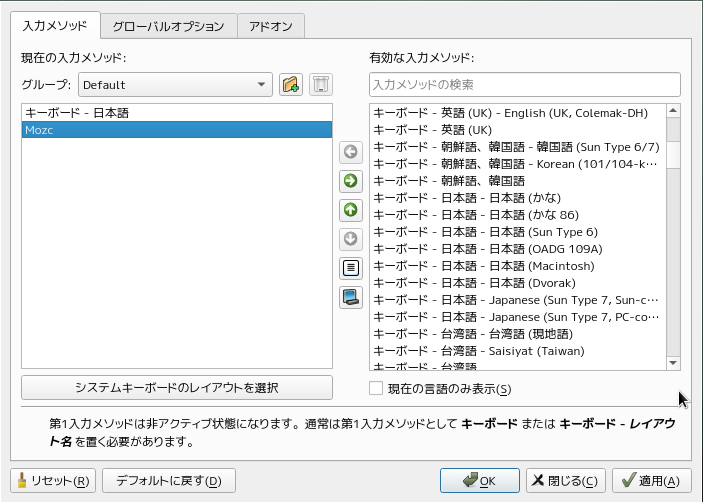
Example fcitx5 configuration
Starting fcitx5 Automatically
To start fcitx5 automatically when hikari launches, add it to hikari’s autostart configuration.
To enable automatic startup of applications in hikari, create the file ~/.config/hikari/autostart with the following contents.
~/.config/hikari/autostart
#!/bin/sh

# Applications to launch automatically
fcitx5 &
Then make the script executable.
chmod +x ~/.config/hikari/autostart
Switching the Terminal Emulator
In my previous hikari article, I introduced foot, a Wayland-native terminal emulator.
However, I was unable to use Japanese input through fcitx5 with the combination of Void Linux + hikari + foot. As a workaround, I switched to sakura, an Xorg-based terminal emulator.
Install it with the following command.
sudo xbps-install sakura
Then update the hikari configuration so that sakura becomes the default terminal. Also, don’t forget to change Sakura’s font to a Japanese font (Migu 1M in this example).
~/.config/hikari/hikari.conf
...omitted
actions {
  terminal = "sakura"
  ...
}
...
}
At this point, your Japanese input environment should be fully configured.
Restart hikari so that it loads the updated startup script. Then open a terminal and launch an editor such as nano or vim. If pressing Ctrl + Space switches the input method successfully, everything is working correctly.
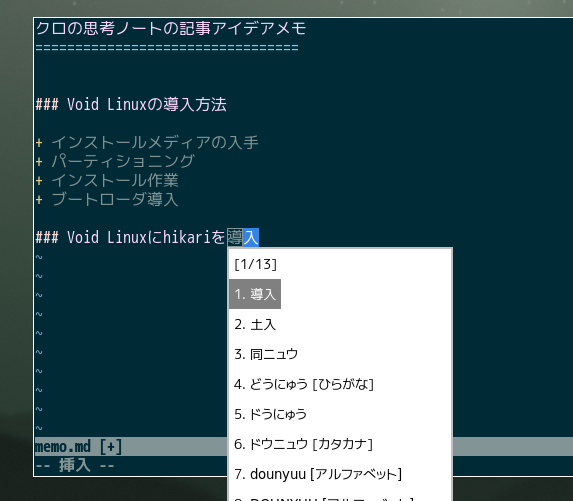
Typing Japanese with fcitx5
Conclusion
Although this was a quick walkthrough, we’ve successfully added Japanese language support to a Void Linux + hikari environment.
With Japanese fonts and an input method configured, the system becomes much more practical for everyday use. In the next article, I’d like to continue customizing this environment and making it even more comfortable.
I hope this guide helps anyone setting up a similar environment.
