Hello! In this article, we’ll customize the Void Linux + hikari environment introduced in the previous article, Using the Wayland Compositor hikari on Void Linux (Installation Guide), into a desktop that’s practical enough for everyday use. Our goal is to build an environment comparable to the desktop experience offered by beginner-friendly Linux distributions.
The Environment We’ll Build
Let’s first take a quick look at what we’re aiming for. We’ll assume you’ve already installed hikari on Void Linux. From there, we’ll customize the system into a more complete desktop environment with the following features:
- Japanese language display and input
- Custom desktop wallpaper
- Desktop notifications
- A modern status bar
- Audio control with PulseAudio
- A user-friendly application launcher
- Screenshots using the Print Screen key
- GUI package management
Applications such as an office suite or web browser can be installed according to your own preferences.
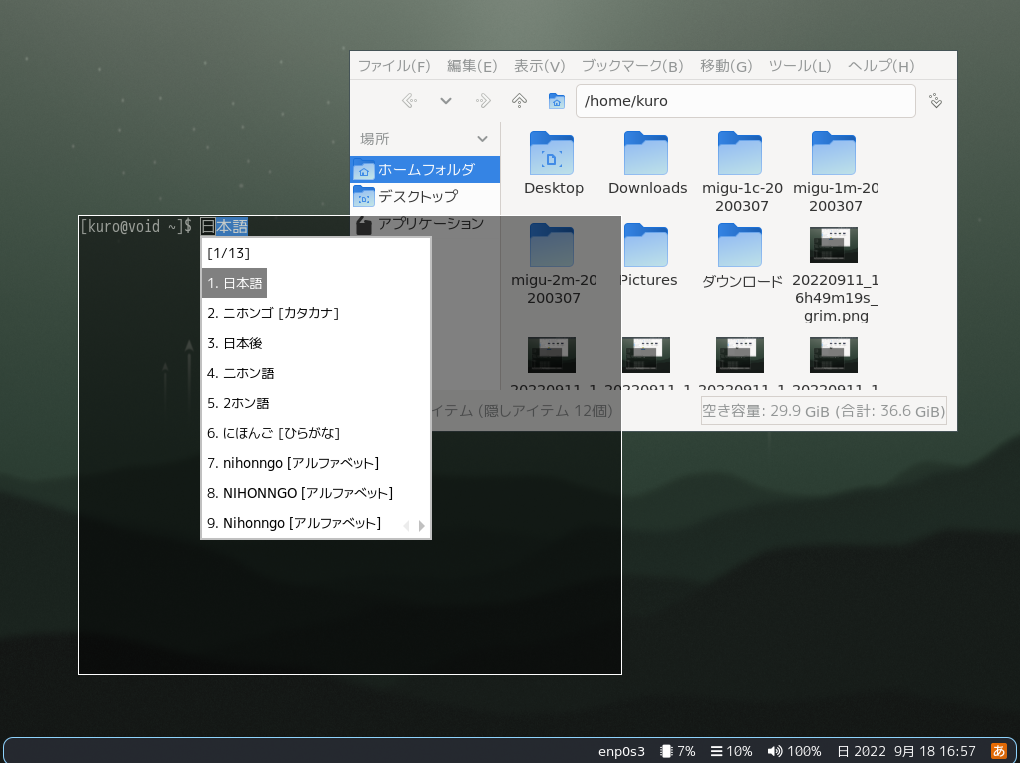
Example 1
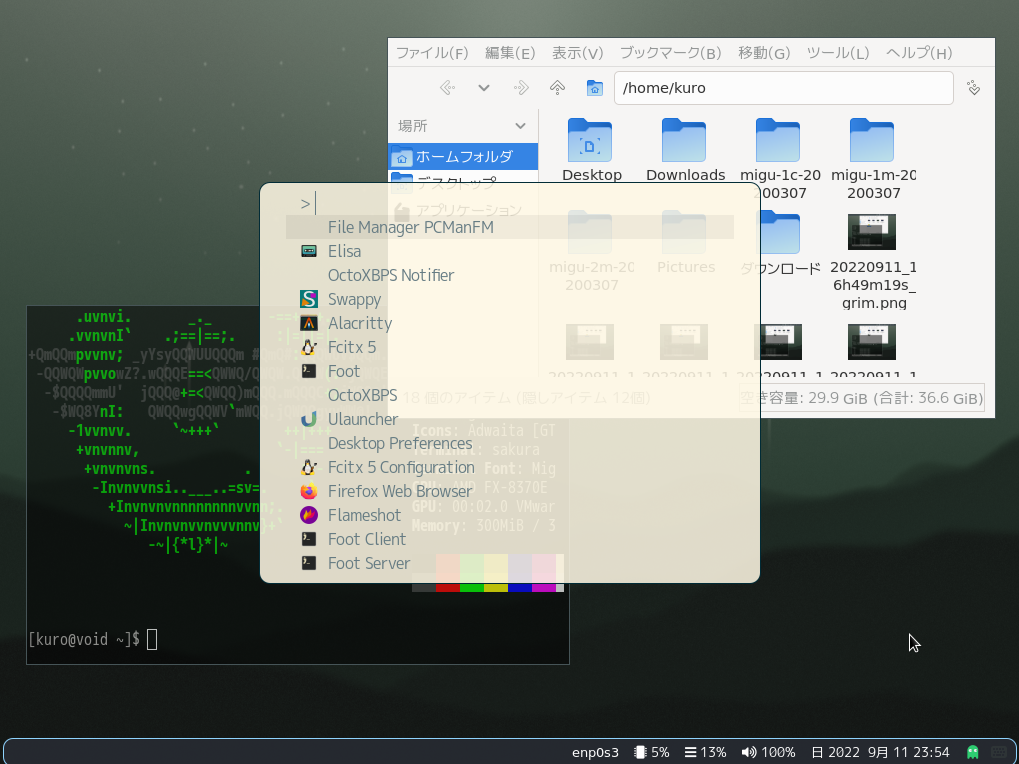
Example 2
Setting Up a Japanese Environment
For Japanese language support, please refer to my previous article:
Building a Japanese Environment on Void Linux + hikari
http://note.kurodigi.com/voidlinux-hikari-ja/
Changing the Wallpaper
You can change the wallpaper by editing hikari’s configuration file. Note that only PNG images are supported.
~/.config/hikari/hikari.conf
...

outputs {
  "*" {
    background = {
      path = "/path/to/image.png"
      fit = stretch
    }
  }
}
The available values for fit are:
stretchcentertile
The default value is stretch.
Installing PulseAudio
Next, let’s install PulseAudio and its graphical volume controller, pavucontrol.
sudo xbps-install pulseaudio pavucontrol
PulseAudio starts automatically when needed, so you don’t have to register it as a service. (See the Void Linux documentation for details.)
You can adjust the volume by launching pavucontrol from your application launcher or by clicking the PulseAudio module in Waybar, which we’ll configure next.
Installing Waybar
Unlike many desktop environments, hikari does not include a status bar, so you’ll need to install one yourself.
For this guide we’ll use Waybar, a Wayland-native status bar that is highly customizable through configuration files and CSS. Many excellent configuration examples are available online, so feel free to personalize it.
Install it with:
sudo xbps-install waybar font-awesome5
Then copy the default configuration files:
mkdir -p ~/.config/waybar/
cp /etc/xdg/waybar/* ~/.config/waybar/
For my own setup, I based both the configuration and CSS on the following repository:
https://github.com/fosskers/dotfiles/blob/master/.config/waybar/config
Don’t forget to install Font Awesome, as Waybar uses it to display icons. On Void Linux, I installed the font-awesome5 package via XBPS.
To start Waybar automatically when hikari launches, add it to:
~/.config/hikari/autostart
...

waybar &

...
Now Waybar will start automatically whenever you launch hikari.
Switching the Launcher
Let’s replace bemenu with fuzzel, a launcher designed for Wayland compositors based on wlroots. It provides an experience similar to Rofi’s drun mode.
Install it with:
sudo xbps-install fuzzel
Then edit your hikari configuration.
~/.config/hikari/hikari.conf
...

actions {
  terminal = "foot"
  launcher = "fuzzel"
}

bindings {
  keyboard {
    ...

    "L+Return" = action-terminal
    "A+p" = action-launcher

    ...
  }
}
With this configuration, pressing Alt + P will launch fuzzel.
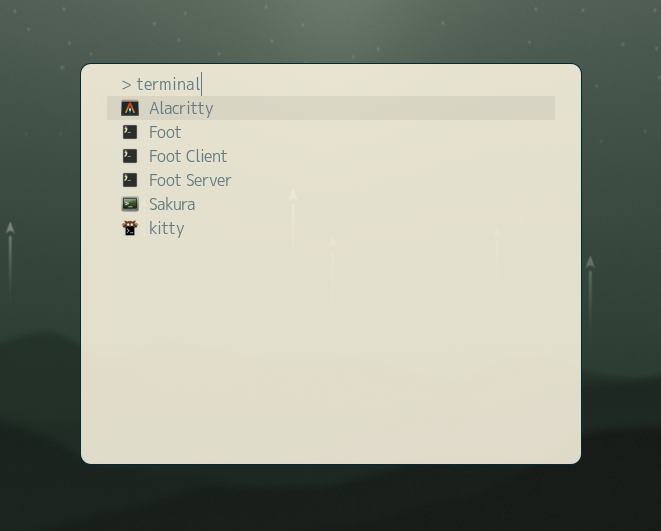
fuzzel
Clipboard Support
Basic copy-and-paste functionality works out of the box in hikari, so you generally don’t need to install any additional packages. However, if you run into clipboard-related issues, I recommend installing wl-clipboard.
Taking Screenshots
For screenshots, we’ll use grim. We’ll configure hikari to save screenshots to ~/Pictures and assign the Print Screen key to capture the screen.
sudo xbps-install grim
~/.config/hikari/hikari.conf
...

actions {
  terminal = "foot"
  launcher = "fuzzel"
  screenshot = "grim ~/Pictures/ss_`date +%Y%m%d-%H%M%S`.png"
}

bindings {
  keyboard {
    ...

    "L+Return" = action-terminal
    "LS+m" = action-launcher
    "0+Print" = action-screenshot

    ...
  }
}
I personally use timestamps in the screenshot filenames, but feel free to customize the naming convention to your liking.
Screen Locking
hikari includes a built-in screen locking feature, so you don’t need to install a separate locker application.
By default, you can lock the screen with:
Super (Logo) + Shift + L
Unlocking the screen simply requires entering your user password.
Desktop Notifications
We’ll use Mako as the notification daemon.
sudo xbps-install mako
Note: The original Japanese article mistakenly shows
sudo xbps-install grimhere. It should bemako.
To start Mako automatically, add the following line to:
~/.config/hikari/autostart
...

mako &
Restart hikari and verify that Mako is running by executing:
notify-send "TEST" "This is just a test message"
The notification text itself doesn’t matter. If you see a desktop notification appear, everything is working correctly.
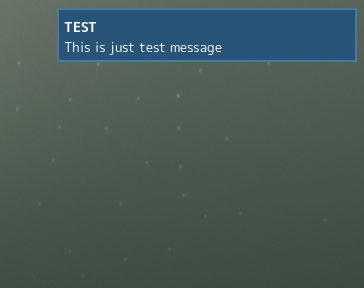
Mako
Installing a GUI Frontend for XBPS
Void Linux uses XBPS as its package management system, and fortunately there is a Qt-based graphical frontend available.
Installing it allows you to browse, install, update, and remove packages through a graphical interface. It also includes a system tray notifier that alerts you when package updates are available.
sudo xbps-install octoxbps
To start the notifier automatically, edit:
~/.config/hikari/autostart
...

xbps-notifier &

...
After restarting hikari, the octoxbps icon will appear in Waybar’s system tray.

octoxbps
Useful Applications
Finally, install any applications you use on a daily basis.
Here are a few commonly used examples:
- Firefox — Web browser (launch with
MOZ_ENABLE_WAYLAND=1for native Wayland support) - PCManFM — File manager
- Audacious — Music player
- Evince — PDF viewer
- Mirage — Image viewer
Some of these applications are not Wayland-native, but they work perfectly well through XWayland.
Final Thoughts
That concludes this guide to transforming a freshly installed Void Linux + hikari system into a desktop environment suitable for everyday use.
There is certainly still room for improvement, and you may wish to customize it further to match your own workflow. However, I hope this article serves as a useful starting point for building your own practical hikari desktop.
Enjoy customizing your Wayland environment, and happy hacking!
