Hello! In this article, I’d like to introduce how to build a lightweight yet practical Wayland desktop environment using Labwc on Void Linux.
I recently installed Void Linux on a new machine and decided to build my desktop environment using Wayland instead of Xorg. After experimenting with several compositors, I eventually switched from Sway to Labwc, and I’d like to share my setup and configuration.
What is Labwc?
Labwc is a stacking Wayland compositor inspired by Openbox. It brings the familiar Openbox workflow to Wayland while remaining lightweight and highly customizable.
One of Labwc’s biggest advantages is that it can use the large collection of existing Openbox themes without modification. If you enjoy building your own desktop environment by combining lightweight tools, Labwc is an excellent choice.
Although tiling compositors such as Sway and Hyprland have become very popular, they can feel intimidating for newcomers. Labwc, on the other hand, provides a more traditional floating desktop similar to LXDE or Xfce, making it much easier to transition to Wayland without changing your workflow.
Goals for This Desktop Environment
Rather than simply installing Labwc, my goal was to build a practical desktop environment by combining interchangeable components while maintaining the usability of traditional desktop environments such as LXDE or Xfce.
Specifically, I wanted the environment to provide the following features:
- Launch applications from shortcuts on the panel
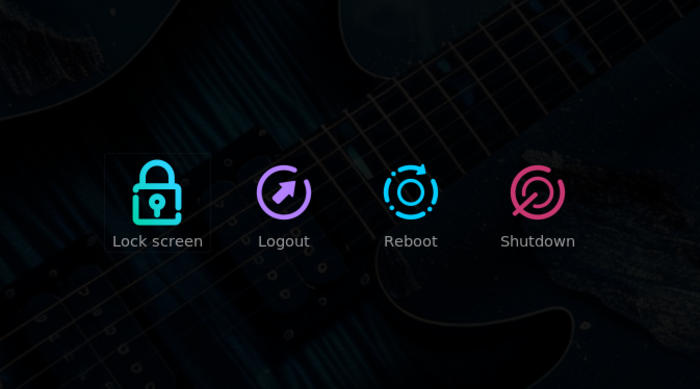
- Shut down or reboot the system using a graphical power menu
- Include a graphical file manager
- Provide a traditional floating (stacking) window environment
- Support wallpapers, screen locking, display power management, and screenshots
- Launch applications from a graphical application launcher
- Open a terminal using a keyboard shortcut
- Move and resize windows entirely from the keyboard
- Allow basic operations using the mouse without relying solely on keyboard shortcuts
- Support multiple workspaces
- Support themes for a polished desktop appearance
The Desktop Environment I Built
The following components make up the desktop environment presented in this article.
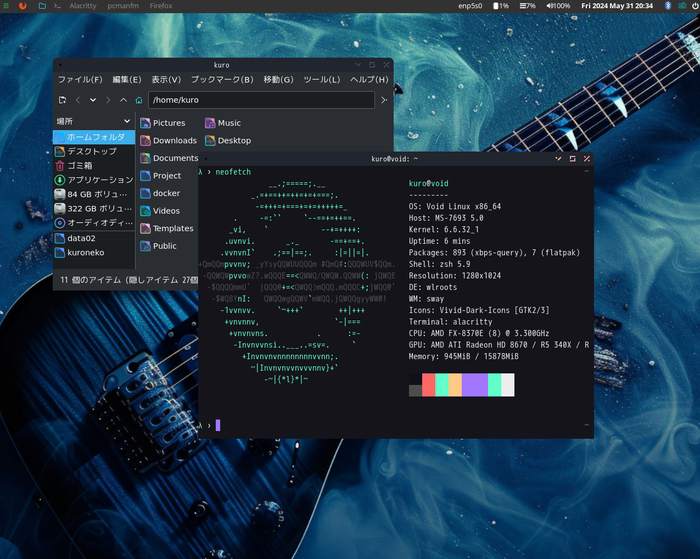
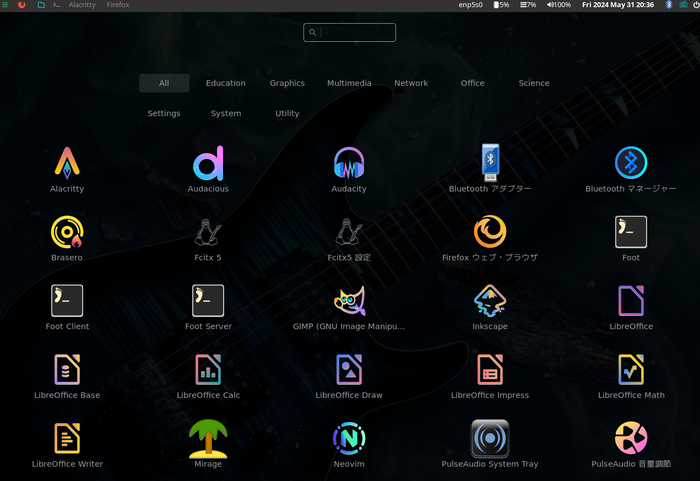
Below are a few screenshots of the finished setup.
Desktop
Application Launcher
Power Menu
The overall configuration is summarized below.
| Component | Software |
|---|---|
| Operating System | Void Linux |
| Startup Method | Started from the console |
| Wayland Compositor | Labwc |
| Panel | Waybar |
| Terminal | Alacritty |
| File Manager | PCManFM |
| Application Launcher | nwg-launcher |
| Audio Server | PulseAudio |
| Audio Mixer | pavucontrol |
| Wallpaper | swaybg |
| Screen Locker | swaylock |
| Screenshot Tool | grim |
| Web Browser | Firefox |
| Japanese Input | Fcitx5 + Mozc |
| GTK Theme | Infinity-GTK |
| GTK Icons | Vivid-Dark-Icons |
| Labwc Theme | Fresh-Theme |
| Japanese Font | VL Gothic |
Preparing Your System for Wayland
Before using Labwc—or any Wayland compositor—you’ll need to prepare your system.
This article assumes you’re using Void Linux. If you’re using Arch Linux, please refer to the ArchWiki for Wayland-specific setup instructions.
First, install the required packages:
sudo xbps-install \
    dbus \
    elogind \
    polkit
Next, enable the dbus service.
Unlike many Linux distributions, Void Linux uses runit instead of systemd for service management. Enable the service with:
sudo ln -s /etc/sv/dbus /var/service/
Installing the Required Packages
Since this guide targets Void Linux, the examples use the XBPS package manager.
If you’re using Arch Linux or another distribution, install the equivalent packages from your distribution’s repositories or the AUR.
sudo xbps-install \
    labwc \
    swaylock \
    swaybg \
    swayidle \
    ngw-launcher \
    waybar \
    grim \
    slurp \
    wlopm \
    mako
Configuring Environment Variables
Labwc loads environment variables from:
~/.config/labwc/environment
These variables are automatically applied whenever Labwc starts.
I use this file to configure language settings and keyboard layout. Labwc supports the following keyboard-related variables:
XKB_DEFAULT_LAYOUTXKB_DEFAULT_MODELXKB_DEFAULT_RULESXKB_DEFAULT_VARIANTXKB_DEFAULT_OPTIONS
Example configuration:
LANG='ja_JP.UTF-8'
MOZ_ENABLE_WAYLAND=1
XKB_DEFAULT_LAYOUT='jp'
Configuring Labwc Key Bindings and Workspaces
Labwc’s default configuration files are located in:
/usr/share/doc/labwc/
Copy them into your user configuration directory before making any changes:
mkdir -p ~/.config/labwc
cp /usr/share/doc/labwc/* ~/.config/labwc/
The primary configuration file is:
~/.config/labwc/rc.xml
In my setup, I customized the key bindings to support Vim-style hjkl keys for moving and resizing windows.
I also configured keyboard shortcuts to launch Alacritty and nwg-launcher. (By default, Labwc uses foot as its terminal emulator.)
For screenshots, the Print key captures the entire screen, while Shift + Print lets you select a region.
<desktops number="4" />

<keyboard>
    <default />

    <!-- Launch terminal -->
    <keybind key="W-Return">
      <action name="Execute" command="alacritty" />
    </keybind>

    <!-- Launch application launcher -->
    <keybind key="W-D">
      <action name="Execute" command="fuzzel" />
    </keybind>

    <!-- Resize mode -->
    <keybind key="W-R">
      <action name="Resize" />
    </keybind>

    <!-- Move windows using Vim-style keys -->
    <keybind key="A-h">
      <action name="MoveRelative" x="-10" y="0" />
    </keybind>

    <keybind key="A-l">
      <action name="MoveRelative" x="10" y="0" />
    </keybind>

    <keybind key="A-k">
      <action name="MoveRelative" x="0" y="-10" />
    </keybind>

    <keybind key="A-j">
      <action name="MoveRelative" x="0" y="10" />
    </keybind>

    <!-- Resize windows -->
    <keybind key="W-j">
      <action name="ResizeRelative" bottom="10" />
    </keybind>

    <keybind key="W-k">
      <action name="ResizeRelative" bottom="-10" />
    </keybind>

    <keybind key="W-l">
      <action name="ResizeRelative" right="10" />
    </keybind>

    <keybind key="W-h">
      <action name="ResizeRelative" right="-10" />
    </keybind>

    ...
</keyboard>
Wallpaper Configuration
For wallpaper management, I use swaybg.
Add the following line to ~/.config/labwc/autostart. Replace /path/to/image with the path to your wallpaper image.
# Set wallpaper
swaybg -i '/path/to/image' -m fill >/dev/null 2>&1 &
Screen Locking and Display Power Management
I use swayidle to manage screen locking and display power.
Append the following to ~/.config/labwc/autostart.
Turn Off the Display After Idle
swayidle -w timeout 600 'wlopm --off' resume 'wlopm --on' >/dev/null 2>&1 &
Lock the Screen and Turn Off the Display
swayidle -w \
	timeout 300 'swaylock -f -c 000000' \
	timeout 600 'wlopm --off *' \
	resume 'wlopm --on *' \
	before-sleep 'swaylock -f -c 000000' >/dev/null 2>&1 &
Notification Support
Start the mako notification daemon by adding the following line to ~/.config/labwc/autostart:
mako >/dev/null 2>&1 &
Japanese Input (Fcitx5)
To start fcitx5 automatically, add the following line to ~/.config/labwc/autostart:
fcitx5 &
Install an input method such as Mozc or Anthy beforehand.
Also add the following environment variables to ~/.config/labwc/environment:
GTK_IM_MODULE="fcitx5"
QT_IM_MODULE="fcitx5"
XMODIFIERS='@im=fcitx5'
Configuring GTK Themes and Icons
Download your preferred GTK theme and icon set from GNOME LOOK.
Install GTK themes under:
/usr/share/themes/
Install icon themes under:
/usr/share/icons/
Then configure GTK to use them.
Example: Set the GTK Theme
gsettings set org.gnome.desktop.interface gtk-theme Infinity-GTK
Example: Set the Icon Theme
gsettings set org.gnome.desktop.interface icon-theme Vivid-Dark-Icons
Applying Openbox Themes
One of Labwc’s advantages is that it can use existing Openbox themes.
Place the theme under either:
/usr/share/themes/
or
~/.local/share/themes/
Then reference it in ~/.config/labwc/rc.xml:
<theme>
  <name>Fresh-Theme</name>
  <cornerRadius>8</cornerRadius>
  <font name="sans" size="10" />
</theme>
Configuring Waybar
For the desktop panel, I chose Waybar.
The main reason is simple: I was already familiar with it from my Sway setup and didn’t feel like installing yet another panel application. However, I made a few changes compared to my old Sway configuration.
In particular, I removed the Sway-specific workspace module and switched to using wlr/taskbar.
Waybar’s configuration file is:
~/.config/waybar/config
The stylesheet is:
~/.config/waybar/style.css
My CSS is based on the following example with a few personal tweaks:
https://github.com/Alexays/Waybar/wiki/Examples#robertjks-configuration
Example config
{
"layer": "top",
"position": "top",
"height": 27,
"modules-left": [
"custom/app",
"custom/browser",
"custom/folder",
"custom/terminal",
"wlr/taskbar"
],
"modules-center": [],
"modules-right": [
"network",
"temperature",
"cpu",
"memory",
"pulseaudio",
"battery",
"clock",
"tray",
"custom/poweroff"
],
"custom/poweroff": {
"format": " ",
"on-click": "nwgbar"
},
"custom/app": {
"format": "",
"on-click": "nwggrid"
},
"custom/terminal": {
"format": "",
"on-click": "alacritty"
},
"custom/folder": {
"format": "",
"on-click": "pcmanfm"
},
"custom/browser": {
"format": " ",
"on-click": "firefox"
},
"wlr/taskbar": {
"format": "{app_id}",
"on-click": "minimize-raise"
},
"tray": {
"spacing": 10
},
"clock": {
"format": "{:%a %Y %b %d %R}"
},
"cpu": {
"format": " {usage}%"
},
"memory": {
"format": " {}%"
},
"temperature": {
"critical-threshold": 75,
"format": " {temperatureC}°C"
},
"battery": {
"bat": "BAT0",
"full-at": 95,
"states": {
"good": 95,
"warning": 30,
"critical": 15
},
"format": "{icon} {capacity}%",
"format-icons": ["", "", "", "", ""]
},
"network": {
"format-wifi": " {essid}",
"format-disconnected": "⚠ Disconnected"
},
"pulseaudio": {
"format": "{icon} {volume}%",
"format-muted": "",
"format-icons": {
"headphones": "",
"default": ["", ""]
},
"on-click": "pavucontrol"
}
}
Finally, make Waybar start automatically by adding the following line to ~/.config/labwc/autostart:
waybar >/dev/null 2>&1 &
Starting Labwc
You can launch Labwc with the following command:
dbus-run-session labwc
Since typing this command every time can be inconvenient, I recommend creating a shell alias to make launching Labwc easier.
Conclusion
This article started out as a simple guide to using Labwc, but as I continued writing, I decided to include a complete example of a practical desktop environment rather than just the compositor itself. As a result, it turned into a much longer article than I originally expected.
I hope this guide helps you get started with Labwc or serves as inspiration for building your own lightweight Wayland desktop.
Happy Linux hacking!
