Installing the Minimal Version of Obarun, an Arch Linux-based Distribution with s6/66 as a Systemd Alternative
2024-09-28
What is Obarun?
Have you heard of the distribution called Obarun? Obarun is a distribution based on Arch Linux, but while Arch Linux uses Systemcd for init/service management, Obarun uses s6 and 66. This is the only major difference, and apart from the different init/service management, Obarun is basically not much different from Arch Linux.
Therefore, if you are familiar with Systemd from major distributions such as Ubuntu, Arch, Fedora, RHLE, etc. and have no particular complaints, there is not much need to choose Obarun. Regarding Systemd, there has long been discussion about whether inti/service management should be freely selectable from the perspective of design philosophy and portability to UNIX-like OS other than Linux. When Debian adopted Systemd, opponents started Devuan which does not use Systemd, and this was also a hot topic. If you are interested in a system with s6 or 66, try Obarun.
Artix is an Arch-based distribution similar to Obarun. In Artix, you can choose from multiple inits, and if you choose s6, you will have a system with a very similar configuration to Obarun, but 66 is a tool unique to Obarun, so the service management method is slightly different. 66 was previously a tool that combined s6 and s6-rc, but now s6-rc has been removed and it is a unique tool.
Installation with Obarun minimal flavor
Obarun comes in two versions: a minimal version that provides a minimal environment with only a console, and a JVM version that provides a GUI environment using the JVM. This time, I will download and install the minimal version. The environment I aim for after installation is a minimal environment without GUI for now. If necessary, I will create my preferred desktop environment. Now let’s take a look at installing Obarun with the minimal version.
Get the installation media
You can get the installation media from the official website. Burn the downloaded iso file to a DVD or copy it to a USB memory so that it can be booted. I created the USB memory with the cat command.
cat /path/to/isofile > /dev/sdX && sync
Execute with root privileges. The sdX part is the disk name of the USB memory. Make sure that sdX is not mounted.
Installation environment
First, let’s organize the author’s installation environment.
| Item | Description |
|---|---|
| BIOS firmware | UEFI |
| Keyboard | Japanese (JIS) layout |
| Installation media | Obarun minimal flavor |
| Internet connection | Wired connection |
Booting the installation media
This time, I will recommend booting with UEFI. Prepare the installation media on a DVD or USB memory, set the machine’s boot priority to the external media, and start the Obarun installation media. When you start it, the login screen will appear, so log in as root or oblive user. The username and password are as follows.
| Username | Password |
|---|---|
| root | toor |
| oblive | toor |
If you want to proceed with the installation with the TUI installer, log in as oblive. If you want to install manually, you can also use root. This time, log in as oblive user.
Keyboard layout setting
The default keyboard layout immediately after logging in is US, so if you have a Japanese keyboard, set the keyboard layout with the following command.
sudo loadkeys jp106
Note that each key layout is located under /usr/share/kbd/keymaps/i386/qwerty/. If you are using a layout other than a Japanese keyboard, please refer to this.
Starting the installer
After logging in, start the TUI installer with the following command.
sudo obarun-install
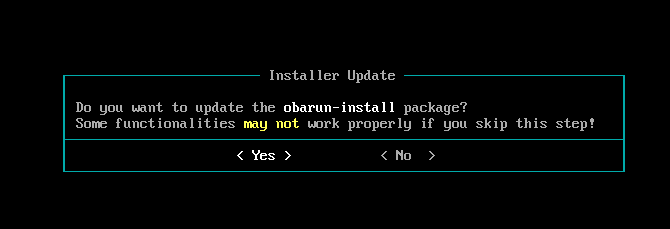
When the network settings are complete and the following screen appears, you are done. You will be asked whether you want to update the installer package, so answer Yes.
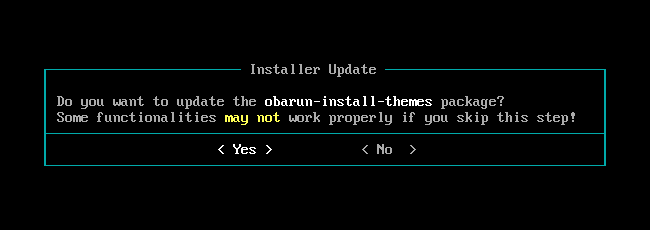
You will be asked again whether you want to update obarun-install-themes, but answer Yes again.
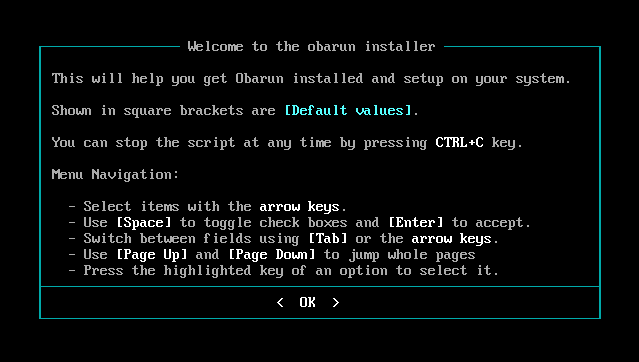
The installer is now ready. Click OK to proceed.
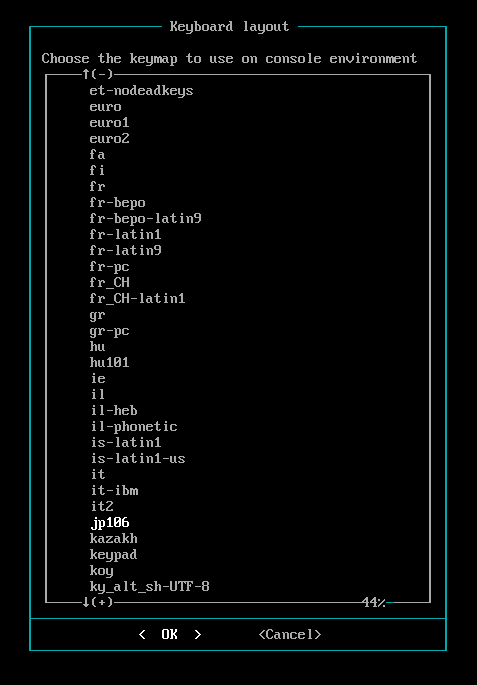
Select the keyboard layout for the system you are installing to. In this case, select jp106.
Configure the settings for installation. In this case, we configured them as shown in the table below.
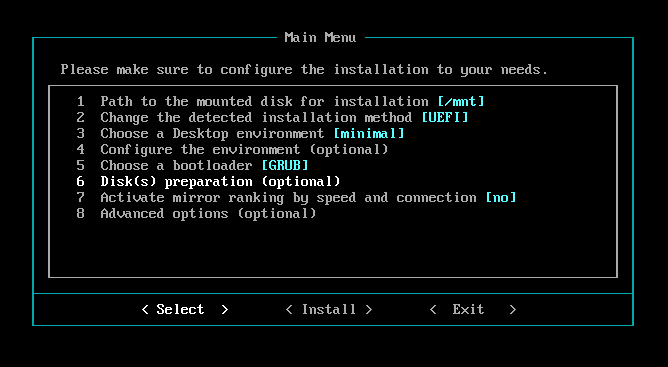
| Item | Details |
|---|---|
| Mount location for installation | /mnt |
| BIOS firmware | UEFI |
| Desktop environment | minimal(no DE) |
| Boot loader | GRUB2 |
Regarding the boot loader, the installer offers three options: Syslinux, GRUB, and EFISTUB. If you install manually, you can choose the same boot loader as Arch Linux.
If you have not yet partitioned and mounted the disk or created a swap, select Disk(s) preparation to perform partitioning and mounting. Details will be explained in the next section.
Disk preparation
Partitioning
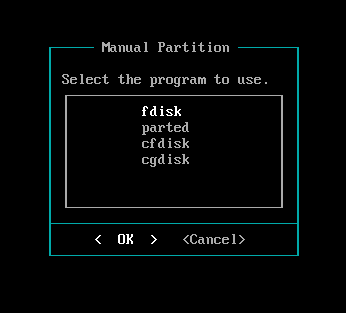
Partitioning can be done from within the TUI installer, but the partitioning tools you can choose from are limited, so I prefer to complete partitioning before starting the installer, but you can prepare without commands from the installer, so use it according to your preference.
This is the partitioning configuration for this time. For convenience, we will assume that the storage to be installed is /dev/sda. This time, we used gdisk for partitioning. fdisk, parted, cfdisk, and cgdisk can be used from within the TUI installer. If you want to use gdisk, please partition using gdisk before starting the installer.
| Disk | Mount location | Format | Capacity |
|---|---|---|---|
| sda1 | / | ext4 | 200GiB |
| sda2 | /boot | FAT32 | 1GiB |
| sda3 | - | swap | 8GiB |
Select item 6: Disk(s) preparation on the Main Menu to enter the disk preparation screen. If you want to leave everything to the system, select “Assisted preparation.” Please note that the entire disk will be erased. If you want to proceed with the preparation yourself, select the second option, “Partition by hand …”
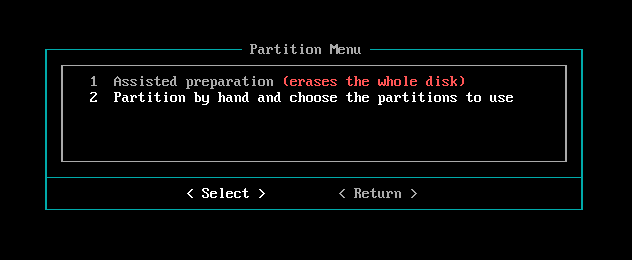
Disk utility selection screen
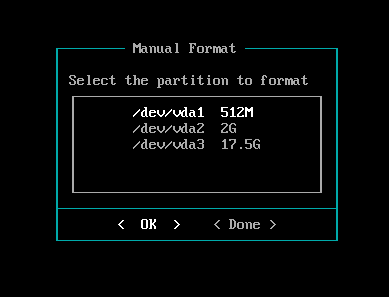
Formatting each partition
You can also format each partition with the installer.
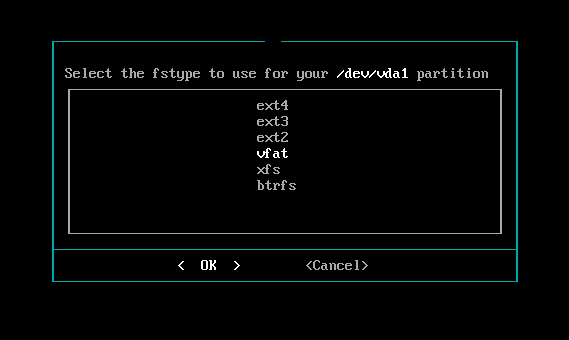
Mounting partitions
Decide the mount location for each partition. Note that you will write the absolute path, so write it as “/mnt/boot”. For the root partition, write “/mnt”.
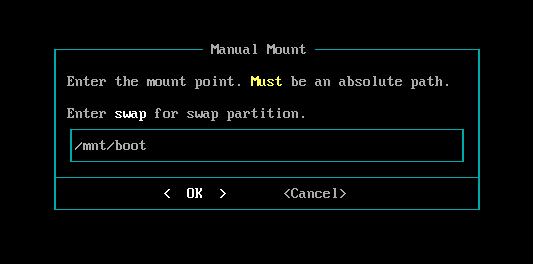
Installing packages
When you’re ready, start the installation process. Select Install from the Main Menu. The installation of system packages will begin.
Setting the root password
When the package installation is complete, you will be taken to the root password setting screen. Set your root password.
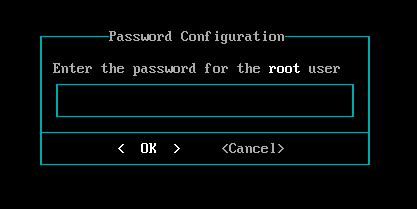
Installing the boot loader
This time, we will install GRUB. Press Yes to start the installation.

Select the boot directory and proceed.
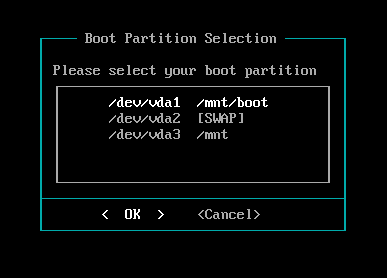
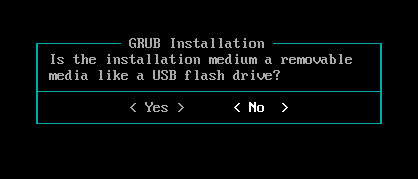
You will be asked if the installation destination is a removable disk such as USB. Select No this time.
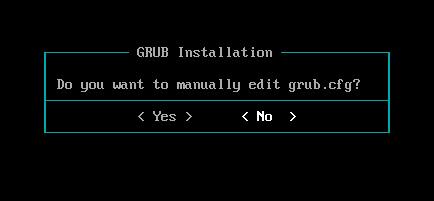
You will be asked if you want to edit grub.cfg manually, so select No to proceed.
Various Settings
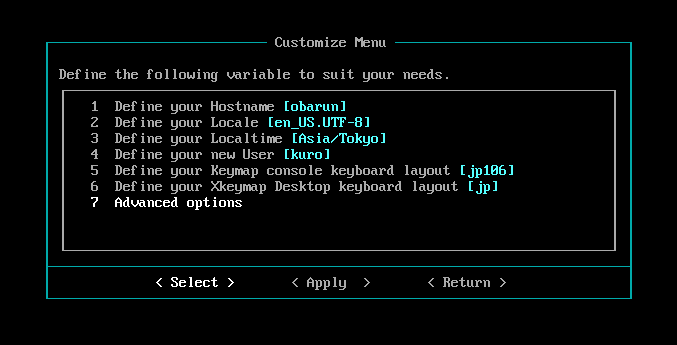
From here on, you will be tasked with setting the region, language, and creating an administrator user. There are no particularly difficult items, but since this time we are installing only the console screen without a desktop environment, the locale value is set to en_US.UTF-8. The plan is to add ja_JP.UTF-8 to the locale after building the desktop environment.
The author’s example settings are as follows.
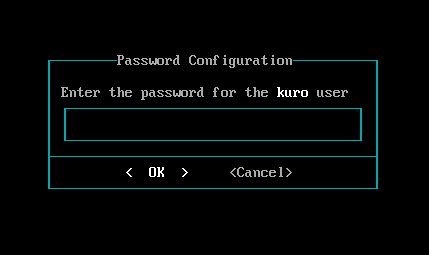
When you proceed with the work by clicking Apply, you will be asked for the user password, so enter it.
Boot test
Thank you for your hard work. Once the installation is complete, shut down the system, remove the installation media, and then reboot. If Obarun can be started successfully and you can log in as the user you set, then you’re OK. After that, just like Arch Linux, install your favorite packages with pacman and build your favorite environment.
Summary
We have looked at the steps to install Obarun, an Arch Linux-based distribution. Although it is based on Arch Linux, it has a TUI installer, so I think it was easier than Arch Linux for those who are familiar with the installation process. The biggest difference between Arch and Obarun is init and service management. In order to use Obarun, you need to become familiar with 66 commands, but other package management using pacman is no different from Arch. I think ArchWiki is a strong ally for Obarun users. I hope this article will enrich your Linux life.